

How to look like Blackpink tutorial by Felicheeta Artistry.
A colourful eyeshadow look that is soooo easy, you will want to try it! (Psss. It’s inspired by Black Pink!!)
If you need more guidance you can check out our YouTube video, it is very easy to follow.
There are days we just want to feel fierce and sexy and usually, the best way to do that is to pair sexy attire with a bold eyeshadow look.
You know how it goes.
If this is you, stay tuned, I’ve got a sexy look you would definitely want to try.
Psst it’s inspired by BlackPink!
If you don’t know BlackPink then go check them out!
Okay so, here are some steps to take you from looking like Mary Sue to a goddess!!

Step One: You have to get your skin glowy so it can shine in the sun. So, you need to apply a base using the Zaron Face Primer. This will not only give you glowy skin like Jenny from BlackPink, it will smooth out your skin and make it a flawless base.
Step Two: Let’s go get that coverage! With Sacha Cosmetics liquid concealer, you can get amazing coverage from just a few drops. Remember to apply your concealer in/on your under eye or anywhere you need extra coverage and blend blend blend to a crease-less finish.
Step Three: The key to a seamless finish lies in your foundation too. So make sure to get a foundation that matches the color of your skin and your skin type. Apply a few dots or really as much as you're comfortable with using your fingers.
Step Four: Finally, use your favourite blending tool and blend in your concealer. Remember not to drag your foundation because that will lead to creases. Just dab, dab, and dab some more until you get your desired look.
2. Add some colour to your cheeks!
Adoniaa Beauty has a great liquid lipstick that can be used as a very pigmented liquid blush. I know I love a multi-purpose product!
Step One: Simply dot the liquid lipstick to the apples of your cheek, and blend it out. (Ps. You can use this same colour of liquid lipstick on your lips, isn’t that cool!)
3. A Gentle Contour!!!
Minimal contour is best for this look using the Zaron Face Definer. This is a very buildable product, which can be used for heavier contouring as well. It’s perfect for the no makeup - makeup days
Step One: With a fluffy brush, you can blend in an upwards motion on your jaw and the top of your forehead.
Step Two: You can contour your nose with a smaller fluffy brush defining its edges in light layers.
Step Three: Finally, soften your contour with a powder highlight by applying it on top of your contour. You can use this highlight to define your nose.
This contour looks so soft and natural!!
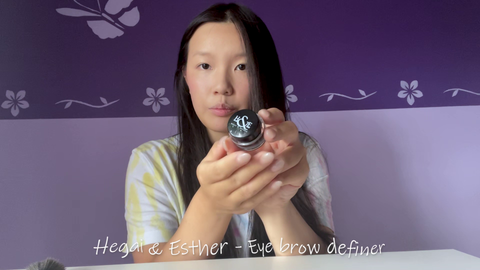
4. Define your eyebrows (naturally!!)
The brow gel definer by Hegai & Esther is very creamy and pigmented, it will definitely give you a natural brow look.
Step One: Use an angled brush to first define the end of your eyebrow then use the remaining product on your brush to feather into the middle and front of your brow for soft natural definition.
Step Two: You can use a spooly brush with very little product to brush your eyebrows upwards for a feathery look!
If you want a feathered eyebrow look, this product is perfect for you!
5. Start your eyeshadow look with a base!
Step One: The key to popping eyeshadow is a sleek base. Pick a base matte color from your contour palette with a fluffy brush and apply it to your eyelids. Remember to give it some pats, we don’t want to smear it but lightly blend it on and under our eyelids for an even base. A smooth and even base equals a fantastic eyeshadow look that will last all day without any creasing!
Step Two: Smoke your eyes with the contour shade (from the Zaron Face Definer Pallette), using a fluffy brush!!
6. Colourful eyeshadow Time!
For a very pigmented eyeshadow look use the House of Tara High-Intensity Pigment Palette. It is absolutely gorgeous!
Step One: Use a small blush for the lavender eyeshadow and apply it on the lid, upwards to your crease. (This is your first crease eyeshadow shade!!)
Step Two: Again, use a different small brush for the pink shade in your crease and blend upwards. Make sure you gently blend the pink with the lavender color for a sort of ombre look.
These two crease colours are so beautiful together, it almost looks like sunset!!
Step Three: Use another small brush for the blue shade and focus the colour towards the outer edges of your eye. And blend upwards towards your eyeshadow.
7. Blend and soften!
Step One: You can soften your eyeshadow with the matte shade from the Zaron Face Definer. This will help blend the eyeshadow better! The shade makes your eyeshadow look so soft and seamless!

8. Under eye makeup to really make your eyes pop!
Step One: Contour your under eye with the middle shade of the Zaron Face Definer Palette
Step Two: Then, use the pink shade again and apply it under your eye with a fluffy brush. You can blend it with the matte shade from the contour palette!
The pink shade is so pigmented and beautiful, Your eyes will pop with this colour!!
9. Make your eyes shimmer and shine!
Step One: Use the glittery highlight shade of the contour palette, which will add definition to your eyeshadow!
I love glittery shades. If you want to go for a bigger eye look then this highlight is for you!
10. Add a subtle wing!!
Step One: Use an angled brush with Gel eyeliner from Zaron by doing a tight line from the inner corner to the outer corner. Pull this eyeliner downwards with a small flick, for a subtle wing.
This gel eyeliner is so smooth and pigmented, making a wing is so easy (even for beginners, like me!!).
11. Time for lashes!
Step One: Curl your lashes with your favorite eyelash curler!
Step Two: apply a light coat of mascara.
Step Three: You can either use your own lashes to complete the look or you can get yourself some mink lashes for that extra dramatic effect.

12. Lips! Lips! Lips!
Step One: Apply the Adonia Beauty liquid lipstick
(ps. This product was also used for blush) and is so pigmented and long-lasting. It’s the perfect product for this look!
That’s all with recreating this mesmerizing look.

Remember to send us a picture of your BlackPink look too!
Here are all the products used:
1. Zaron’s Face Primer
https://felicheetaartistry.com/products/face-primer
2. Sacha Cosmetics liquid concealer
https://felicheetaartistry.com/products/liquid-concealer-cover-me-almond
3. Adoniaa Liquid lipstick
https://felicheetaartistry.com/products/24h-lipstick-dreamgirl
4. Eyebrow definer by Hegai & Esther
https://felicheetaartistry.com/products/eyebrow-definer-nubia
5. Zaron Face Definer Pallette
https://felicheetaartistry.com/products/xd-face-definer?variant=31853849247808
6. House of Tara High-Intensity Pigment Palette
https://felicheetaartistry.com/products/margaret-ekpo-12-shades-eyeshadow-palette
7. Gel Eyelinere from Zaron
https://felicheetaartistry.com/products/gel-eyeliner-01-jazz